So much client information at your fingertips, so little screen space to display it!
Data is at its most useful when it is presented in a fashion that is understandable and digestible to the reader. Not enough information presented and you end up with an incomplete picture or context of a client and their situation. Too much information presented and you could end up diluting key information or moving the reader’s attention away from the presented information because it is not presented in a readable form.
Let’s explore some ways to customise your XPLAN Client Focus Title to display key client data that is easy to reference and read.
Example

Things to consider before-hand
- You must have the user capabilities assigned to your login profile to be able to perform the steps contained in this tech tip;
- System Setting – to configure this for all users on your XPLAN site
- User Settings – Client Focus – to configure this for your own XPLAN user profile
- The sculptor Henry Moore was famous for saying, “less is more”. In the world of user experiences, the same notion can apply. When trying to affect user behaviour, think about how someone will navigate, view and use the screen. Are the changes you are making going to enhance their experience and lead to a better outcome? Or are you just adding ‘noise’ to the screen layout?
- Don’t be afraid to test and learn. Start small and insert a highly used XPLAN field that is consistently referenced (eg Category, Phone Number, Adviser, Suburb). See what works from there, what doesn’t and refine until you find your ideal Client Focus Title fields to display
Step 1
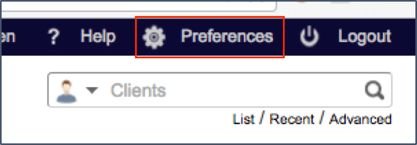
Click on the User Preferences icon in the top right of the XPLAN screen
Step 2
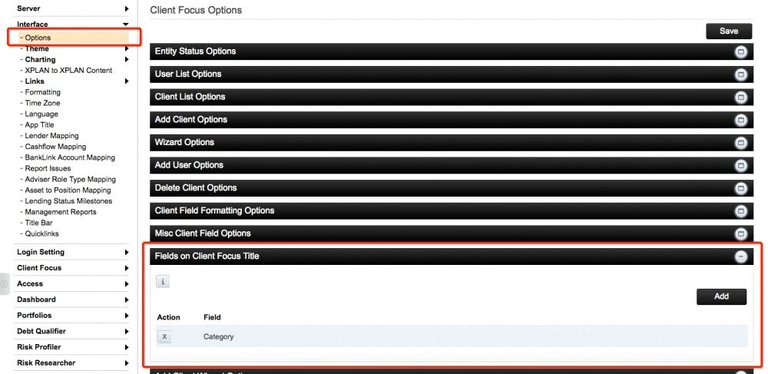
Navigate through the left side menu Client Focus > Options. On screen you will see a section header titled, Fields on Client Focus Title.
If you are minimalist or want to start from clean slate, the Remove All button is handy. Otherwise click on Add to display the field you would like to add to the Client Focus Title.

Step 3
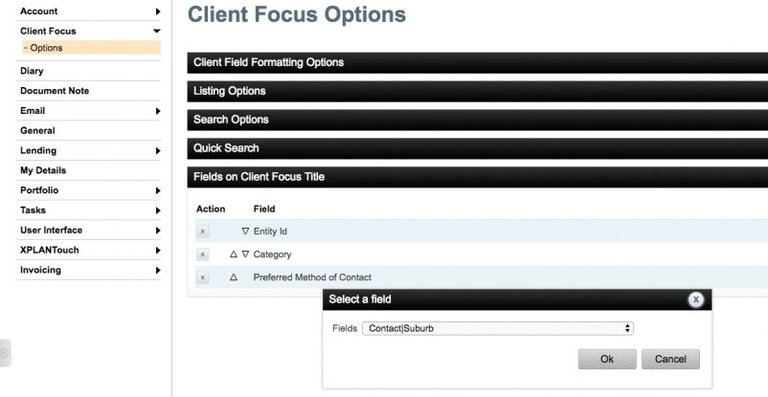
Select the field you would like to display, in the Client Focus Title.
Note that the available fields listed are from the XPLAN Entity table. This means that it is generally information that is stored directly against a client record as single data points (fields like Date of Birth or Client Category), rather than multi data points (group fields like Address (street name, street number, suburb, postcode etc).
There are some Entity fields that reference XPLAN group fields so you’re not totally lost. As in the example below in the screenshots, I can choose Preferred Method of Contact and Suburb.
Some examples of potential fields to use:
- Preferred Name
- Date of Birth
- Salutation
- Client Category
- Suburb
- Client Status
Step 4
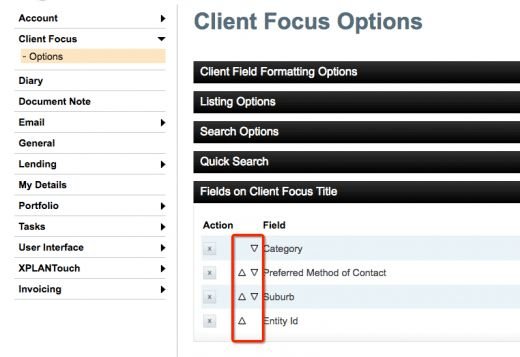
Once you have added all the Entity fields you would like to display in the title, you can then re-order the list via the up and down satellite button highlighted below
Step 5
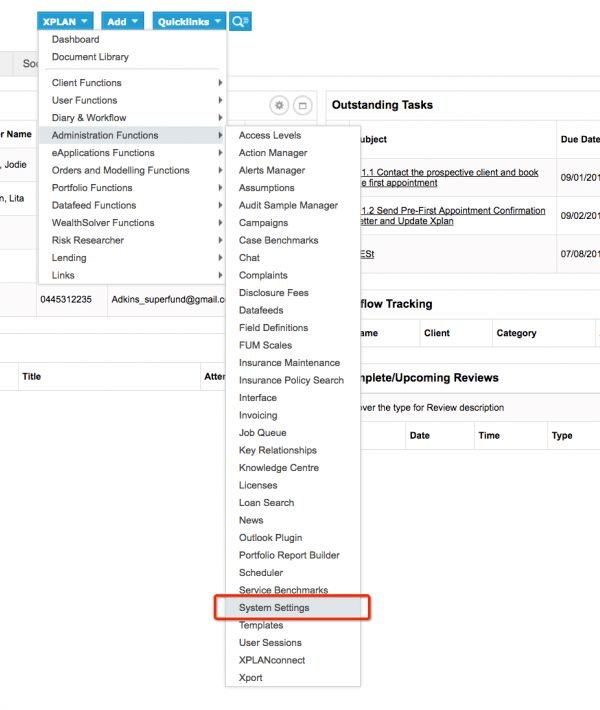
If you would like to configure this for all users on your XPLAN site you can follow the same actions outlined in Step 2-4 but through the XPLAN System Settings page (XPLAN > Administration Functions > System Settings)
Left Menu option (Interface > Options) and Section Header (Fields on Client Focus Title)

Step 6
Bask in the glory of your handy-work!
At Planfocus, we create unique hand-crafted XPLAN sites that deliver your advice brand and use XPLAN to its full potential. If you would like help setting up Client Focus headings or want to learn more about our services, please get in touch.

